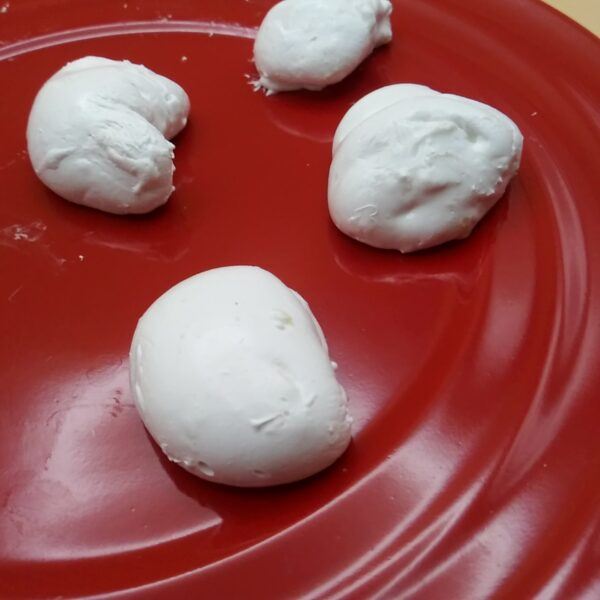
Divinity candy holds a special place in many holiday traditions. This sweet, melt-in-your-mouth confection is meant to be light and airy. There is nothing more frustrating than biting into that sweet concoction, and instead of melting on your tongue, it gets caught between your teeth or leaves your jaw sore from all the chewing. So why is my divinity candy chewy? Not correctly whipping your egg whites and cooking the candy syrup to the wrong temperature.
Affiliate Disclosure: Some of the links below are affiliate links, meaning at NO additional cost to you, I may earn a small commission if you click through and make a purchase. See full disclosure
Why Is My Divinity Candy Chewy?
Divinity candy is meant to practically melt in your mouth with its delicate, sugary texture. But the recipe is quite finicky, and there are two key reasons your divinity can quickly turn chewy and dense. First, undercooking the sugar syrup prevents it from reaching the proper temperature to fully set up the candy. Second, under-whipping the egg whites fails to incorporate enough air and stability. Properly whipped egg whites are crucial for trapping tiny air bubbles that create divinity’s signature lightness. Without adequately whipping the whites before and after adding the hot syrup, you lose the structure needed for that melt-away texture
Whipping
The whipping comes in 2 stages. Each stage is important for your divinity to get that melt-in-you-mouth texture.
First Stage
I have found that separating the eggs when they are cold is much easier than room temperature eggs. Once separated, let your egg whites come to room temperature before whipping them.
Room-temperature egg whites will whip up better and with more volume than cold egg whites
Starting at a slow speed, whip the egg whites until just beginning to froth, then switch to high speed and continue to whip them to stiff peaks. Not whipping the egg whites enough leads to droopy, flat whites that can’t properly hold up the syrup’s weight, and you will be left with a chewy, gummy candy that falls flat.
Second Stage
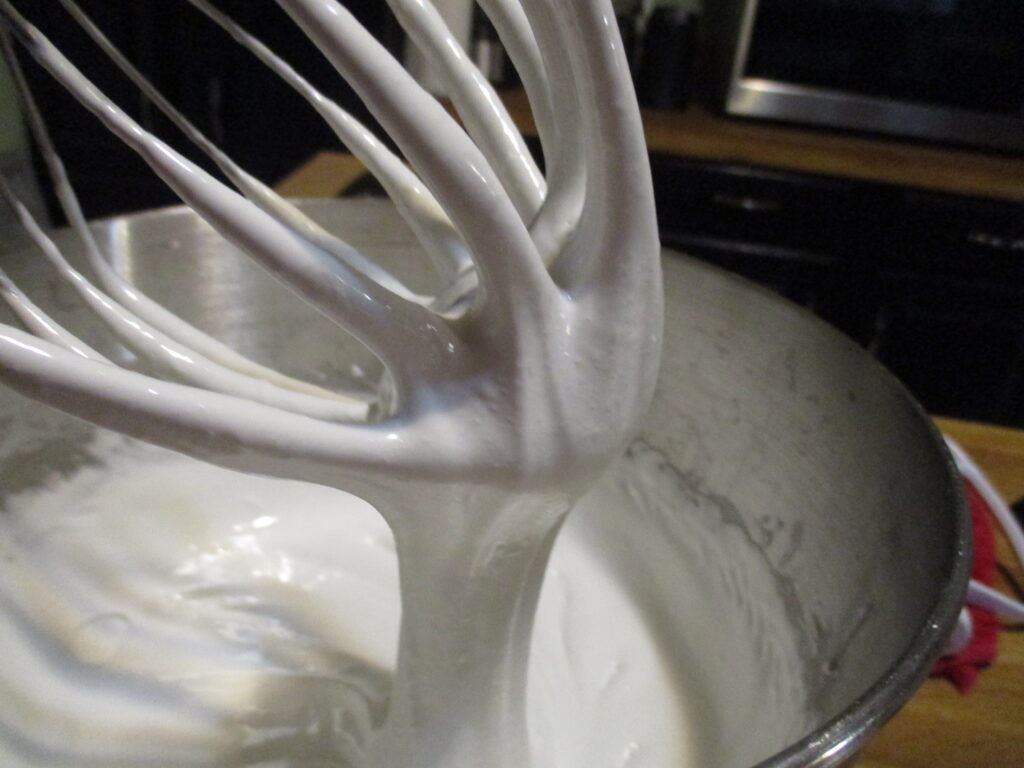
Once the syrup has reached the right temperature, it is time to add it to your perfectly whipped egg whites. With your mixer at high speed, begin to slowly and steadily add the hot syrup. This helps the syrup mix completely with the egg whites and warm them gradually.
Caution: Don’t rush this step. Patience, my friend, and you will be rewarded with soft divine divinity.
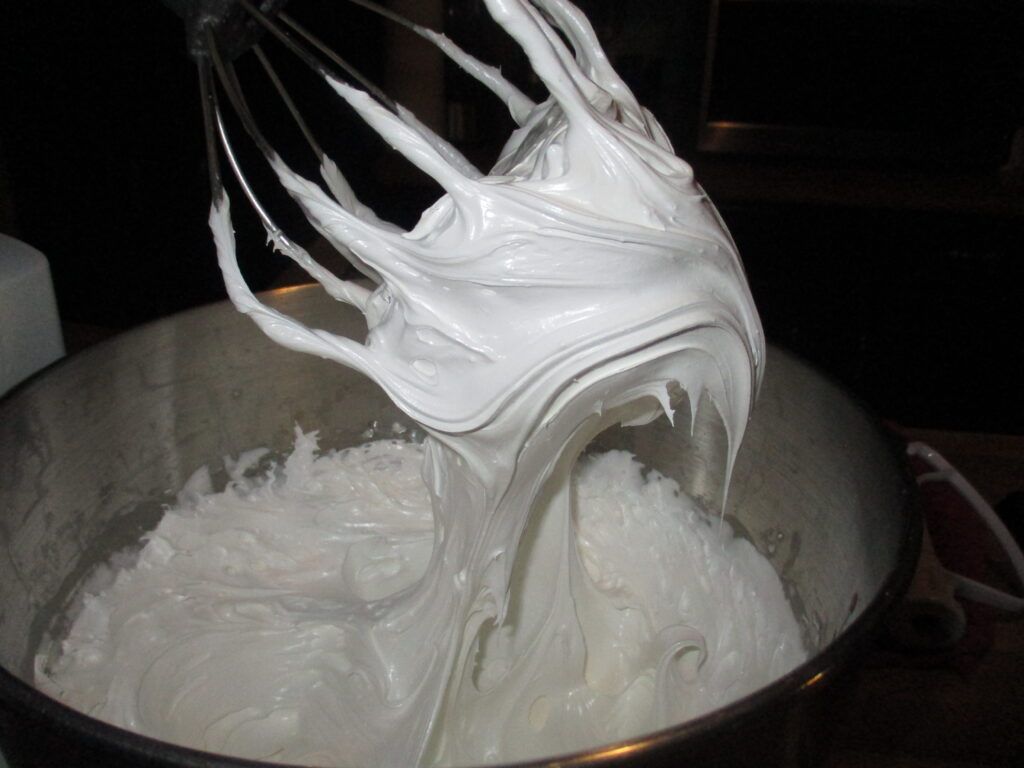
After all the hot syrup has been added, you need to continue whipping/beating the candy until it starts to lose its gloss or shine and hold its shape. This can take 4 to 5 minutes, but you need to watch this carefully because there have been times it has only taken me 3 to 4 minutes to get to this stage. But then again, it has taken me longer than 5 minutes to get to this stage.
The key is when it BEGINS to lose its shine/gloss. NOT when it has lost it completely. If it has, you have overbeaten it, and your divinity will just crumble.
But you do not want to underbeat it. Underbeating it, you will get that chewy texture. There have been many times that I was afraid of overbeating the candy and ended up underbeating it, and the final result was chewy divinity.
This step just comes down to practice, practice, and more practice. it can go from under-beaten to over-beaten in a matter of seconds. I will stop my stand mixer and check the candy about every 2 minutes.
Lift the beaters, and if the candy drops back into the bowl, it is not ready. When you lift the beaters and the candy holds its shape but still has some shine to it, it is ready.
As an Amazon Affiliate, I may earn a commission from qualifying purchases.
Temperature

Getting the sugar syrup to the right temperature is a must for making melt-in-your-mouth divinity. The ideal temperature is around the 260-degree or hardball stage. Miss the mark, and your divinity will not “set up.”
Bring the sugar mixture to a boil over medium heat, then let it simmer until the thermometer hits 260°F. Resist cranking up the heat too quickly, as this can cause crystallization. The temperature needs to come up gradually so the syrup doesn’t burn.
Watch it closely as it approaches the target range – sugar temperatures can creep up swiftly at the end. Immediately remove the pan from heat when it hits 260°F to keep it from overcooking.
No thermometer? No problem. You can test the syrup manually using a cold water test. Drop a teaspoon of hot syrup into ice-cold water.
🍬 Candy Temps 101! 🍭 | |
|---|---|
| Thread | 225° to 235° – 🕸 Forms thin threads |
| Softball | 235° to 245° – 🥎 Flattens when removed from water |
| Firmball | 245° to 250° – 🏀 Loses shape when pressed |
| Hardball | 250° to 266° – ⚾️ Holds shape but sticky |
| Soft Crack | 270° to 290° – 🕸 Firm, flexible threads |
| Hard Crack | 300° to 310° – 💥 Brittle, crisp threads |
| Brought to you by wearebaking.com 🧁 | |
My mom made perfect divinity every year at Christmas using a hand mixer and a cup of cold water. She never owned a candy thermometer. It can be done. But using a candy thermometer is going to give you the best accuracy.
Here are some tips regarding candy thermometers.
Are you ready to tackle this finicky candy called Divinity?
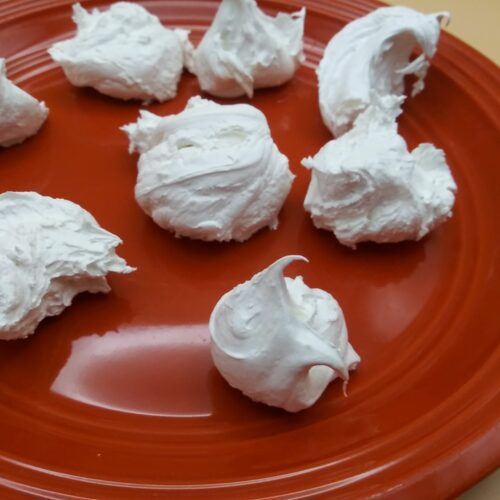
Divinity Candy Recipe
Ingredients
- 2 1/2 cups sugar
- 1/2 cup light corn syrup
- 1/2 cup water
- 1/4 teaspoon salt
- 2 egg whites, room temperature
- 1 teaspoon vanilla
- 1/2 cup chopped pecans, optional
Instructions
- In a 2 quart saucepan, combine sugar, corn syrup, water, and salt
- Cook to the hardball stage (260 degrees), stirring only until sugar is dissolved
- As the temperature of the syrup reaches 250 degrees, beat egg whites until stiff peaks form
- When the syrup reaches 260 degrees, very slowly add the syrup to the egg whites, beating at high speed.
- Add vanilla and beat until the candy holds its shape and starts to lose its shine/gloss, 4-5 minutes. Note here: it may take longer
- Stir in the chopped nuts if using.
- Quickly drop candy from a teaspoon onto waxed paper, swirling the top of each piece.
- Let cool
Final Thoughts
Divinity may seem finicky, but with care and patience, you can make delicious melt-in-your-mouth candy. Perfecting your syrup cooking and egg white whipping techniques is key for sweet success.
For best results, use a thermometer and aim for the hardball stage. Whip those whites into heavenly peaks before gently folding in the hot syrup. Then beat until the mixture is stiff, glossy, and just losing its sheen.
With practice, you’ll be an expert at making divinity that practically dissolves on the tongue. Soon, these sweet, puffy clouds will be a new family tradition! Don’t abandon divinity after one chewy batch – this ethereal candy is worth mastering.
Please leave a comment below
And As Always
Keep On Baking!
Taianne
Frequently Asked Questions
Here are some FAQs when it comes to making Divinity.
Q: What can I do if my divinity won’t harden and is sticky?
A: Sticky, tacky divinity is likely due to under-cooked syrup or under-whipped egg whites. Try cooking the syrup to a higher temperature, like 265°F, to allow for proper setting. Be sure to whip whites to stiff peaks and beat the finished mixture for 5+ minutes to fully dry it out. Adding a teaspoon of powdered sugar can also help absorb moisture.
Q: How do I get crystallized sugar out of my divinity syrup?
A: Crystallization happens when the syrup is cooked too quickly. To dissolve sugar crystals, wash down any sugar crystals from the pot sides with a brush and add a bit of water. Then reheat gently, without stirring, just until crystals fully dissolve again before resuming cooking to the hard ball stage.
Q: How long does homemade divinity candy last?
A: Properly stored divinity will last 1-2 weeks at room temperature in an airtight container. To maximize freshness, layer the pieces between sheets of wax or parchment paper. Avoid refrigerating as it can cause weeping and moisture. For longer storage, divinity can be frozen for up to 3 months. Thaw overnight in the refrigerator before serving.

I’m Taianne, the owner and operator behind We Are Baking. Baking my first cake at age 11 hooked me on creating sweet treats. Though my interest faded during childhood, it was rekindled when I married my apple pie-loving husband. I love trying new recipes, tweaking classics, and helping others learn the science and art of baking. I started We Are Baking to share tips, tricks, and favorite recipes I’ve discovered over the years. When not in the kitchen, I enjoy spending time with family and friends. My goal is to inspire others to embrace their creativity through baking. Feel free to contact me with any questions!
Taianne@wearebaking.com
