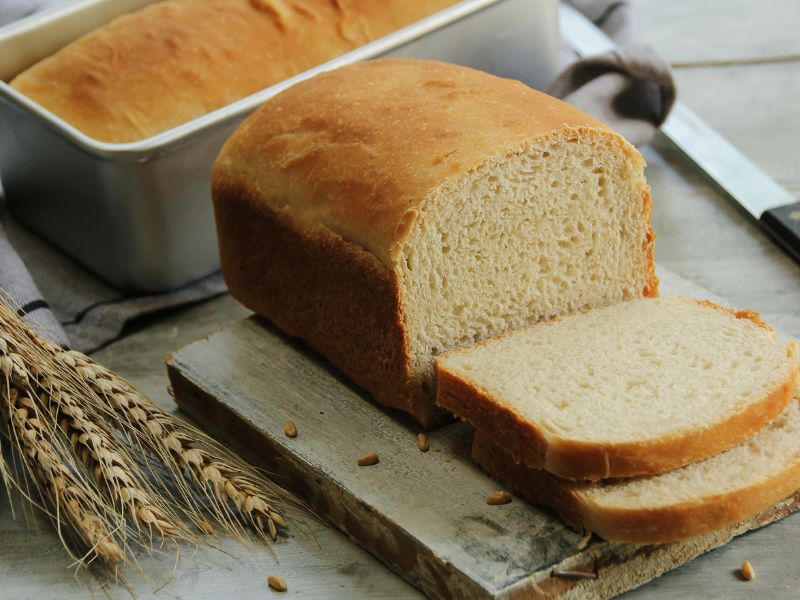
Who doesn’t like the smell of fresh homemade bread baking in the oven? The aroma just takes over the house. The saliva is already pooling in my mouth with just the thought. My imagination is running overboard, and I just can’t wait to smother butter on that warm slice of bread. My drool runneth over. How to make homemade bread, you ask. Well, it’s really easier than you think. With a few tips and an understanding of the ingredients, you’ll be making homemade bread, and your family will love you for it.
Yeast is Just Yeast Right?
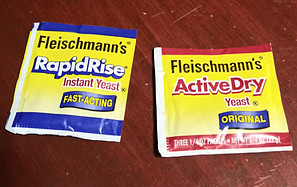
Well, yes, in a way. There are 2 main types of yeast. Active dry yeast and instant (rapid rise) yeast. Active dry yeast looks like tiny pebbles and instant yeast is really fine, like sand, therefore making it dissolve faster. Active yeast is usually “proofed” with warm water and sugar before adding to the dry ingredients, but instant yeast is just added to the dry ingredients.
If you are using active dry yeast, the water/liquid temperature is important. If your water/liquid is too cool, it will not activate the yeast, and if it is too hot, it will kill the yeast. I use an instant-read thermometer. The sugar helps to “feed” the yeast during proofing.
You can use them interchangeably, but you need to add an extra 15 minutes to your rising time when using active dry yeast instead of the rapid rise. I prefer active dry yeast and “proofing” in warm water.
When it “bubbles,” then I know the yeast is active and working. You just need to become familiar with the yeast you decide to use and stay with that particular yeast unless a recipe calls for a specific kind.

Bread Flour Vs All-Purpose Flour
Bread flour has more protein content and helps with gluten development. They can be used interchangeably. I have to admit that when I started baking bread I did use bread flour. But one day I ran out and used all-purpose flour and I found that my bread really wasn’t any different. So I exclusively use all-purpose flour now. The important tip here is to make sure you are measuring correctly. I spoon the flour into the measuring cup until full and then scrape it with a knife to level. I also sift my flour after measuring.
Other Ingredients and their Importance
Salt controls the fermentation rate of the yeast, has a strengthening effect on the gluten protein in the dough, and contributes to the overall flavor. Oil helps with lubrication when handling the dough and eases dough expansion. Also provides better slicing. Sugar helps “feed” the yeast for a faster rise, and It acts as a preservative, keeping the bread fresher for longer.
Kneading Your Bread Dough

Kneading is the process of working bread dough until it is formed into a smooth ball with an elastic texture. The process is key for forming gluten, responsible for giving the bread structure and texture. There are two methods of kneading.
- Kneading by hand. On a floured surface, pull the dough away from you by pressing down and forward, then bring the dough back towards you by folding it in half, then push forward again. This method usually takes seven to ten minutes.
- Mechanical Kneading. Use a dough hook on your stand mixer and let the machine do the work for you. I have to admit that I use this method after receiving a KitchenAid stand mixer several years ago for Christmas. While the dough is kneading in the stand mixer, I can do other things. But you need to keep an eye on the mixer. You don’t want to over-knead. Practice makes perfect.
Some of the links below are affiliate links, and as an Amazon Affiliate, I earn from qualifying purchases at No additional cost to you. See Affiliate Disclosure
Pan Sizes

There are many loaf pan sizes. The bigger the pan, the bigger the loaf of bread, and of course, the smaller the pan, the smaller the loaf. These can make a difference in your finished product. I recommend USA Pan Bakeware Aluminized Steel 1 Pound Loaf Pans. My favorite pans when baking bread. You can get them here.
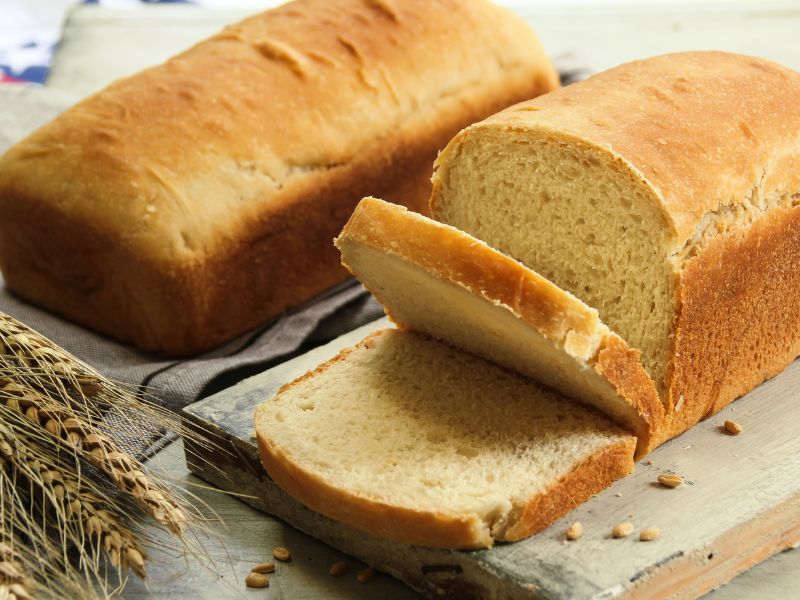
Homemade Bread Recipe
This is my favorite bread recipe of all time. I have tried other recipes, but I keep coming back to this one. I have to admit that I misread the recipe regarding the sugar.
I thought it read 3/4 cup sugar when the recipe really calls for 2/3 cup sugar. That batch of bread came out the best I’ve ever made. My grandson asked me if I had put honey in it.
I admit it had a nice, sweet taste. The batches of bread I made using the correct amount of sugar have not lived up to my mistake.
But I leave that up to you. By all means, follow the recipe exactly, but just try my mistake and see what you think.
Ingredients
- 2 cups of warm water at about 110-120 degrees
- 2/3 cup white sugar
- 1 1/2 Tablespoons yeast
- 1 teaspoon salt
- 1/4 cup vegetable oil
- 6 cups flour
Directions
- Place sugar and water in a bowl. I use the bowl of my stand mixer.
- Sprinkle with yeast and let dissolve for 5-15 minutes This is proofing the yeast. It should bubble. If it doesn’t, then your yeast is not any good.
- Add salt, oil, and half the flour and mix together
- Add the remaining flour a little at a time ( it might not take all of it) until the dough is no longer sticky. Change to a dough hook and mix till it’s pulling away from the side(( I continue “kneading” the dough with the dough hook for 4-5 minutes.
- Pull out onto a lightly floured surface and knead shortly
- Place in a greased bowl, flipping to cover both sides
- Top with saran wrap or a damp, warm towel
- Set aside in a draft-free area and let rise till it doubles in size. About 1 hour. (I put mine in my microwave).
- Remove the cover and punch down.
- Lay the dough out on a lightly floured surface and cut it in half
- Flatten out each half into a rectangle, and “jelly” roll into a loaf.
- Pinch ends together and place in greased 9×5 bread pans
- Repeat with the other half
- Cover and let rise till double in size, about 30-50 minutes.
- Pre-heat oven to 350 degrees
- Once double in size, bake for 25-30 minutes
- Pull out and brush tops with butter
- Let rest 10 minutes before removing to a cooling rack
- Enjoy!


Bread is done if you tap it and you hear a hollow sound. Also, if you want to use a thermometer, the temperature should be 190 degrees.
Final Thoughts
I know bread-making can seem intimidating. But it really is easier than you think.
There are mainly two types of yeast. The rapid rise can be added right into your dry ingredients, and then there is the active dry yeast that needs to be proofed in warm water.
Bread flour has a higher protein content, which gives your bread that chewy texture. But all-purpose flour will work as well.
Kneading your dough is an important step whether you do it by hand or with a stand mixer with the dough hook.
Now you know how to make homemade bread. Give it a try. I bet you won’t be sorry you did.
Have you made homemade bread? If so, I would love to hear about your experiences.
Please leave a comment below
An As Always
Keep On Baking
Taianne
Share the Love!

I’m Taianne, the owner and operator behind We Are Baking. Baking my first cake at age 11 hooked me on creating sweet treats. Though my interest faded during childhood, it was rekindled when I married my apple pie-loving husband. I love trying new recipes, tweaking classics, and helping others learn the science and art of baking. I started We Are Baking to share tips, tricks, and favorite recipes I’ve discovered over the years. When not in the kitchen, I enjoy spending time with family and friends. My goal is to inspire others to embrace their creativity through baking. Feel free to contact me with any questions!
Taianne@wearebaking.com